Asaro Heads
A guide to the prototyping, printing, and casting procedures I used to create concrete sculptures
Nov 5, 2025
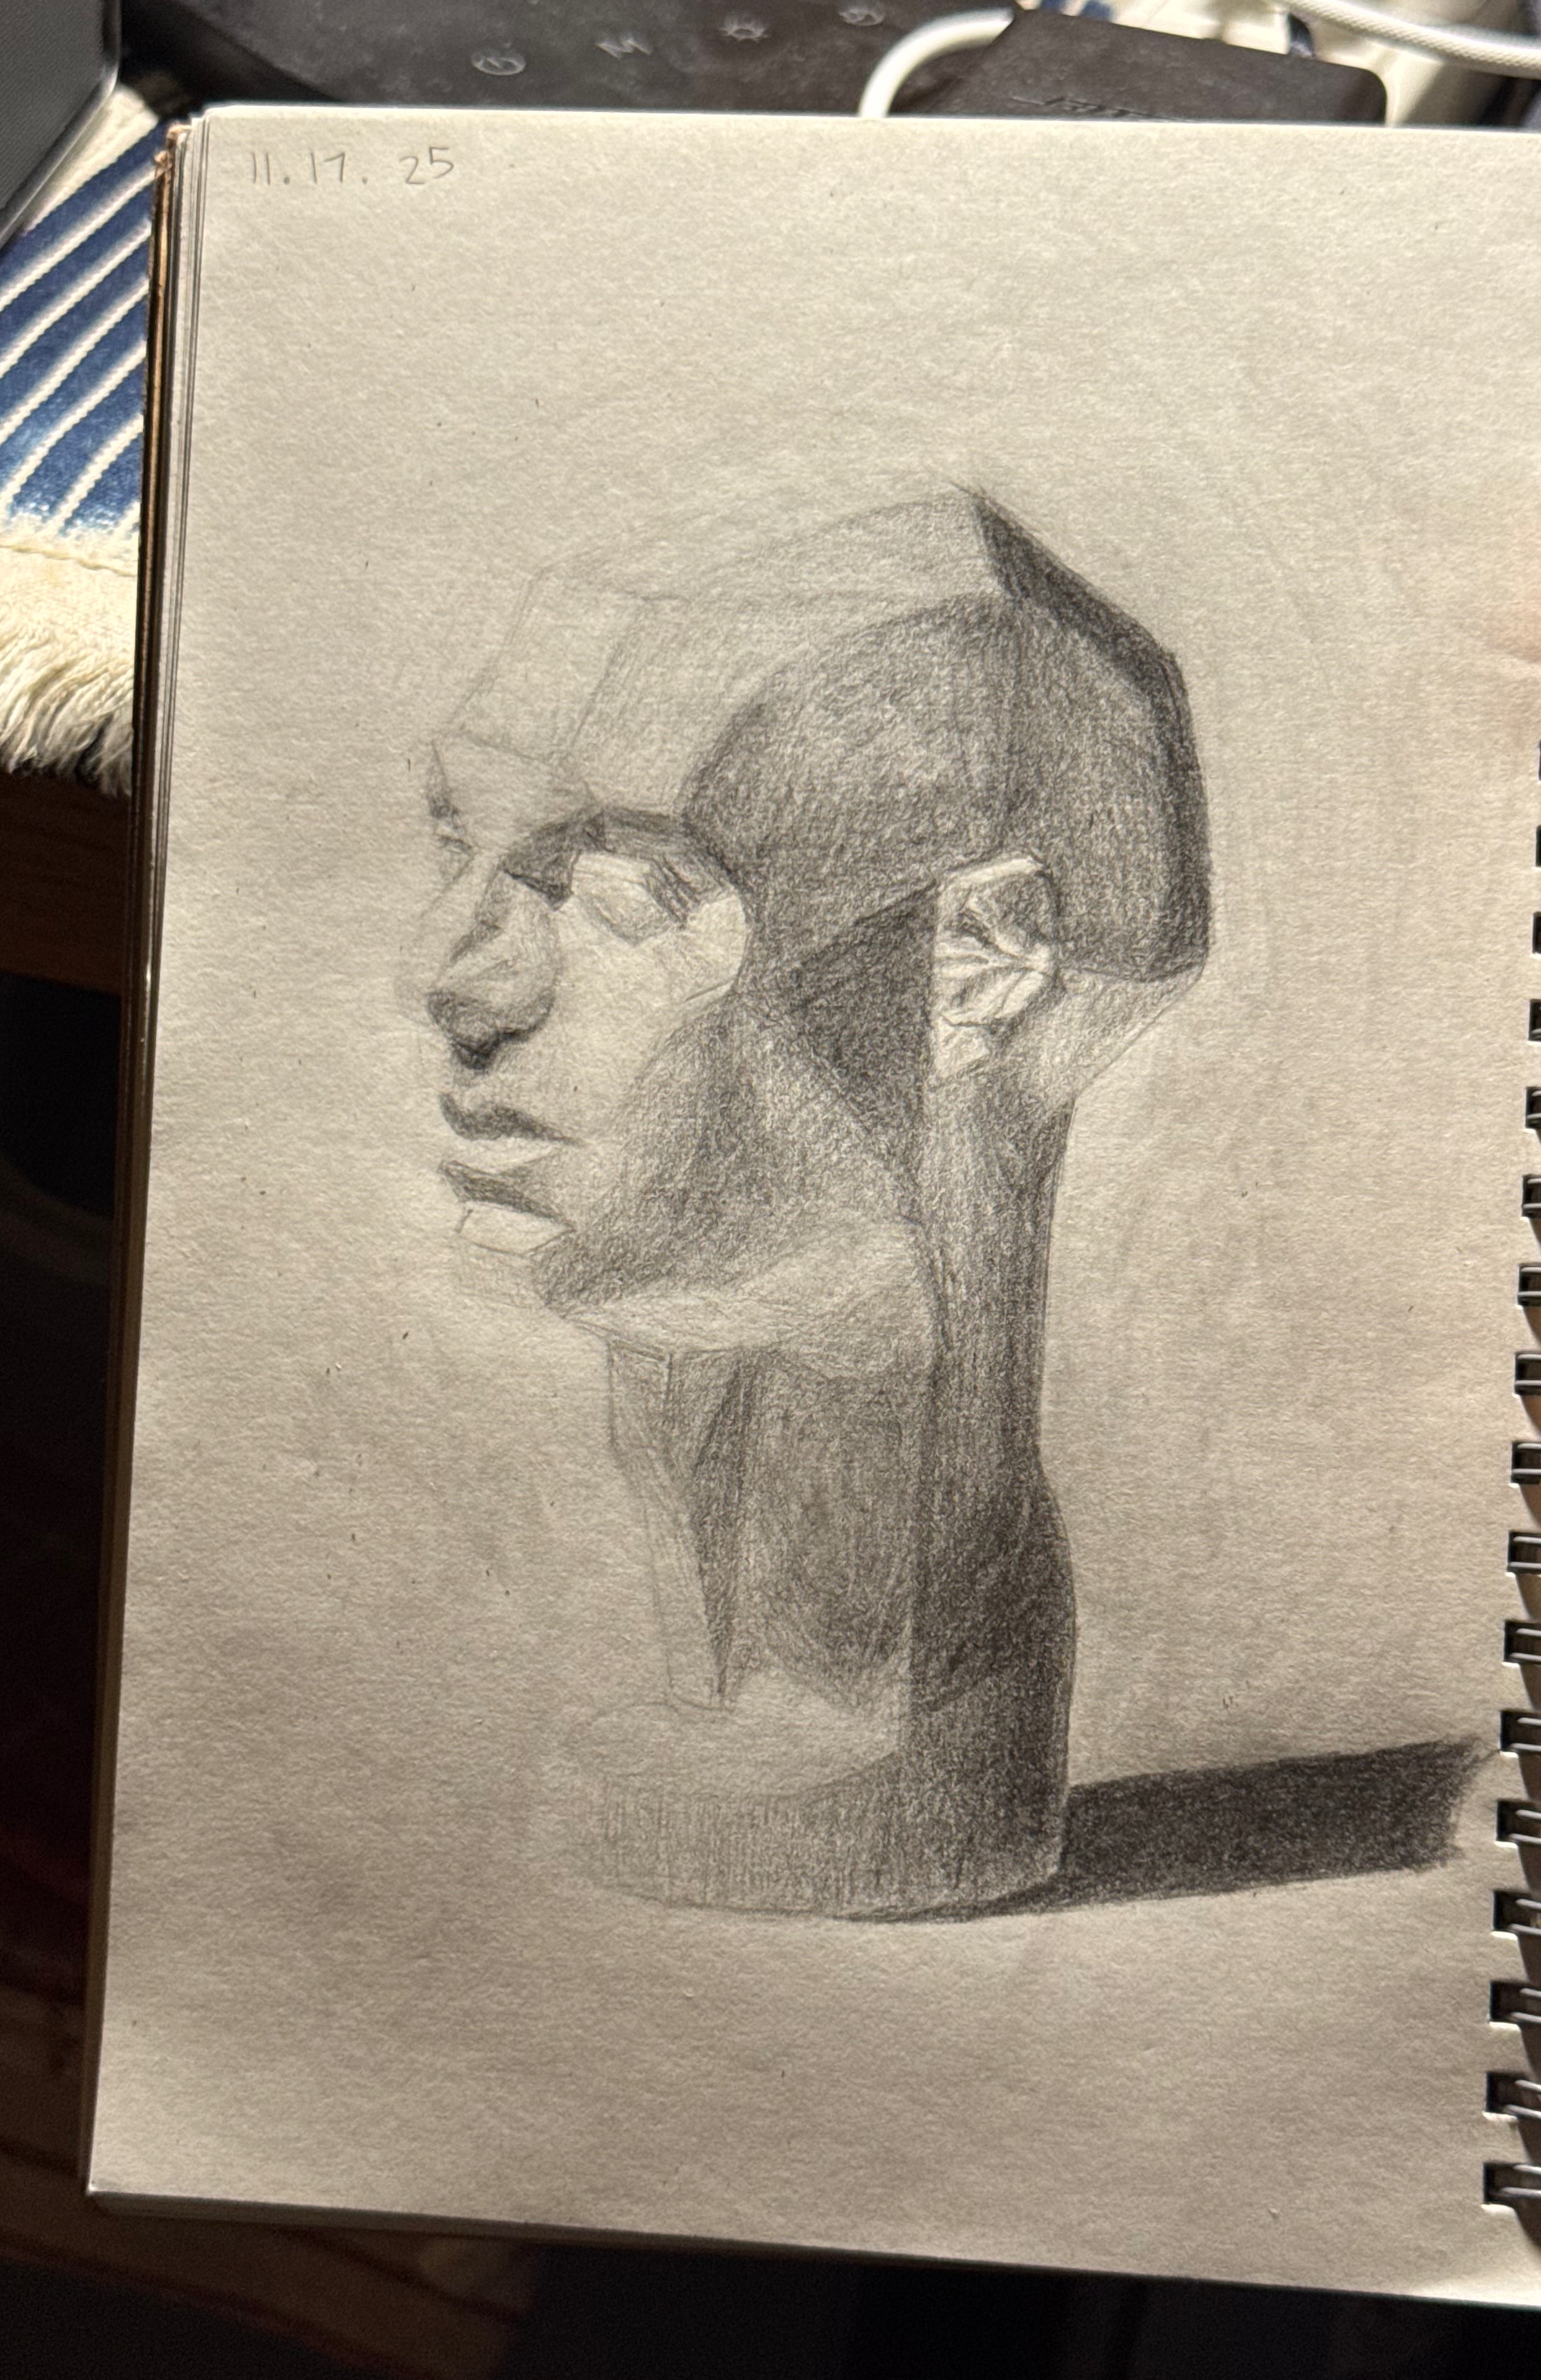
A couple summers ago, I wanted to learn how to draw people—specifically, faces. However, having started with almost no drawing experience, I found it difficult to accurately replicate the proportions and values (light and shadow) of complex subjects.
I went in search of anatomy tutorials online, and one of the approaches I found useful was the Asaro head, an abstracted model which made it easier to identify the simple planes/geometries that make up the human face. But in reality these models are expensive, made from a cheap grey plastic, and generally too large to store in a dorm room. I believed I could achieve better results by making my own 6-inch Asaro head, in concrete.
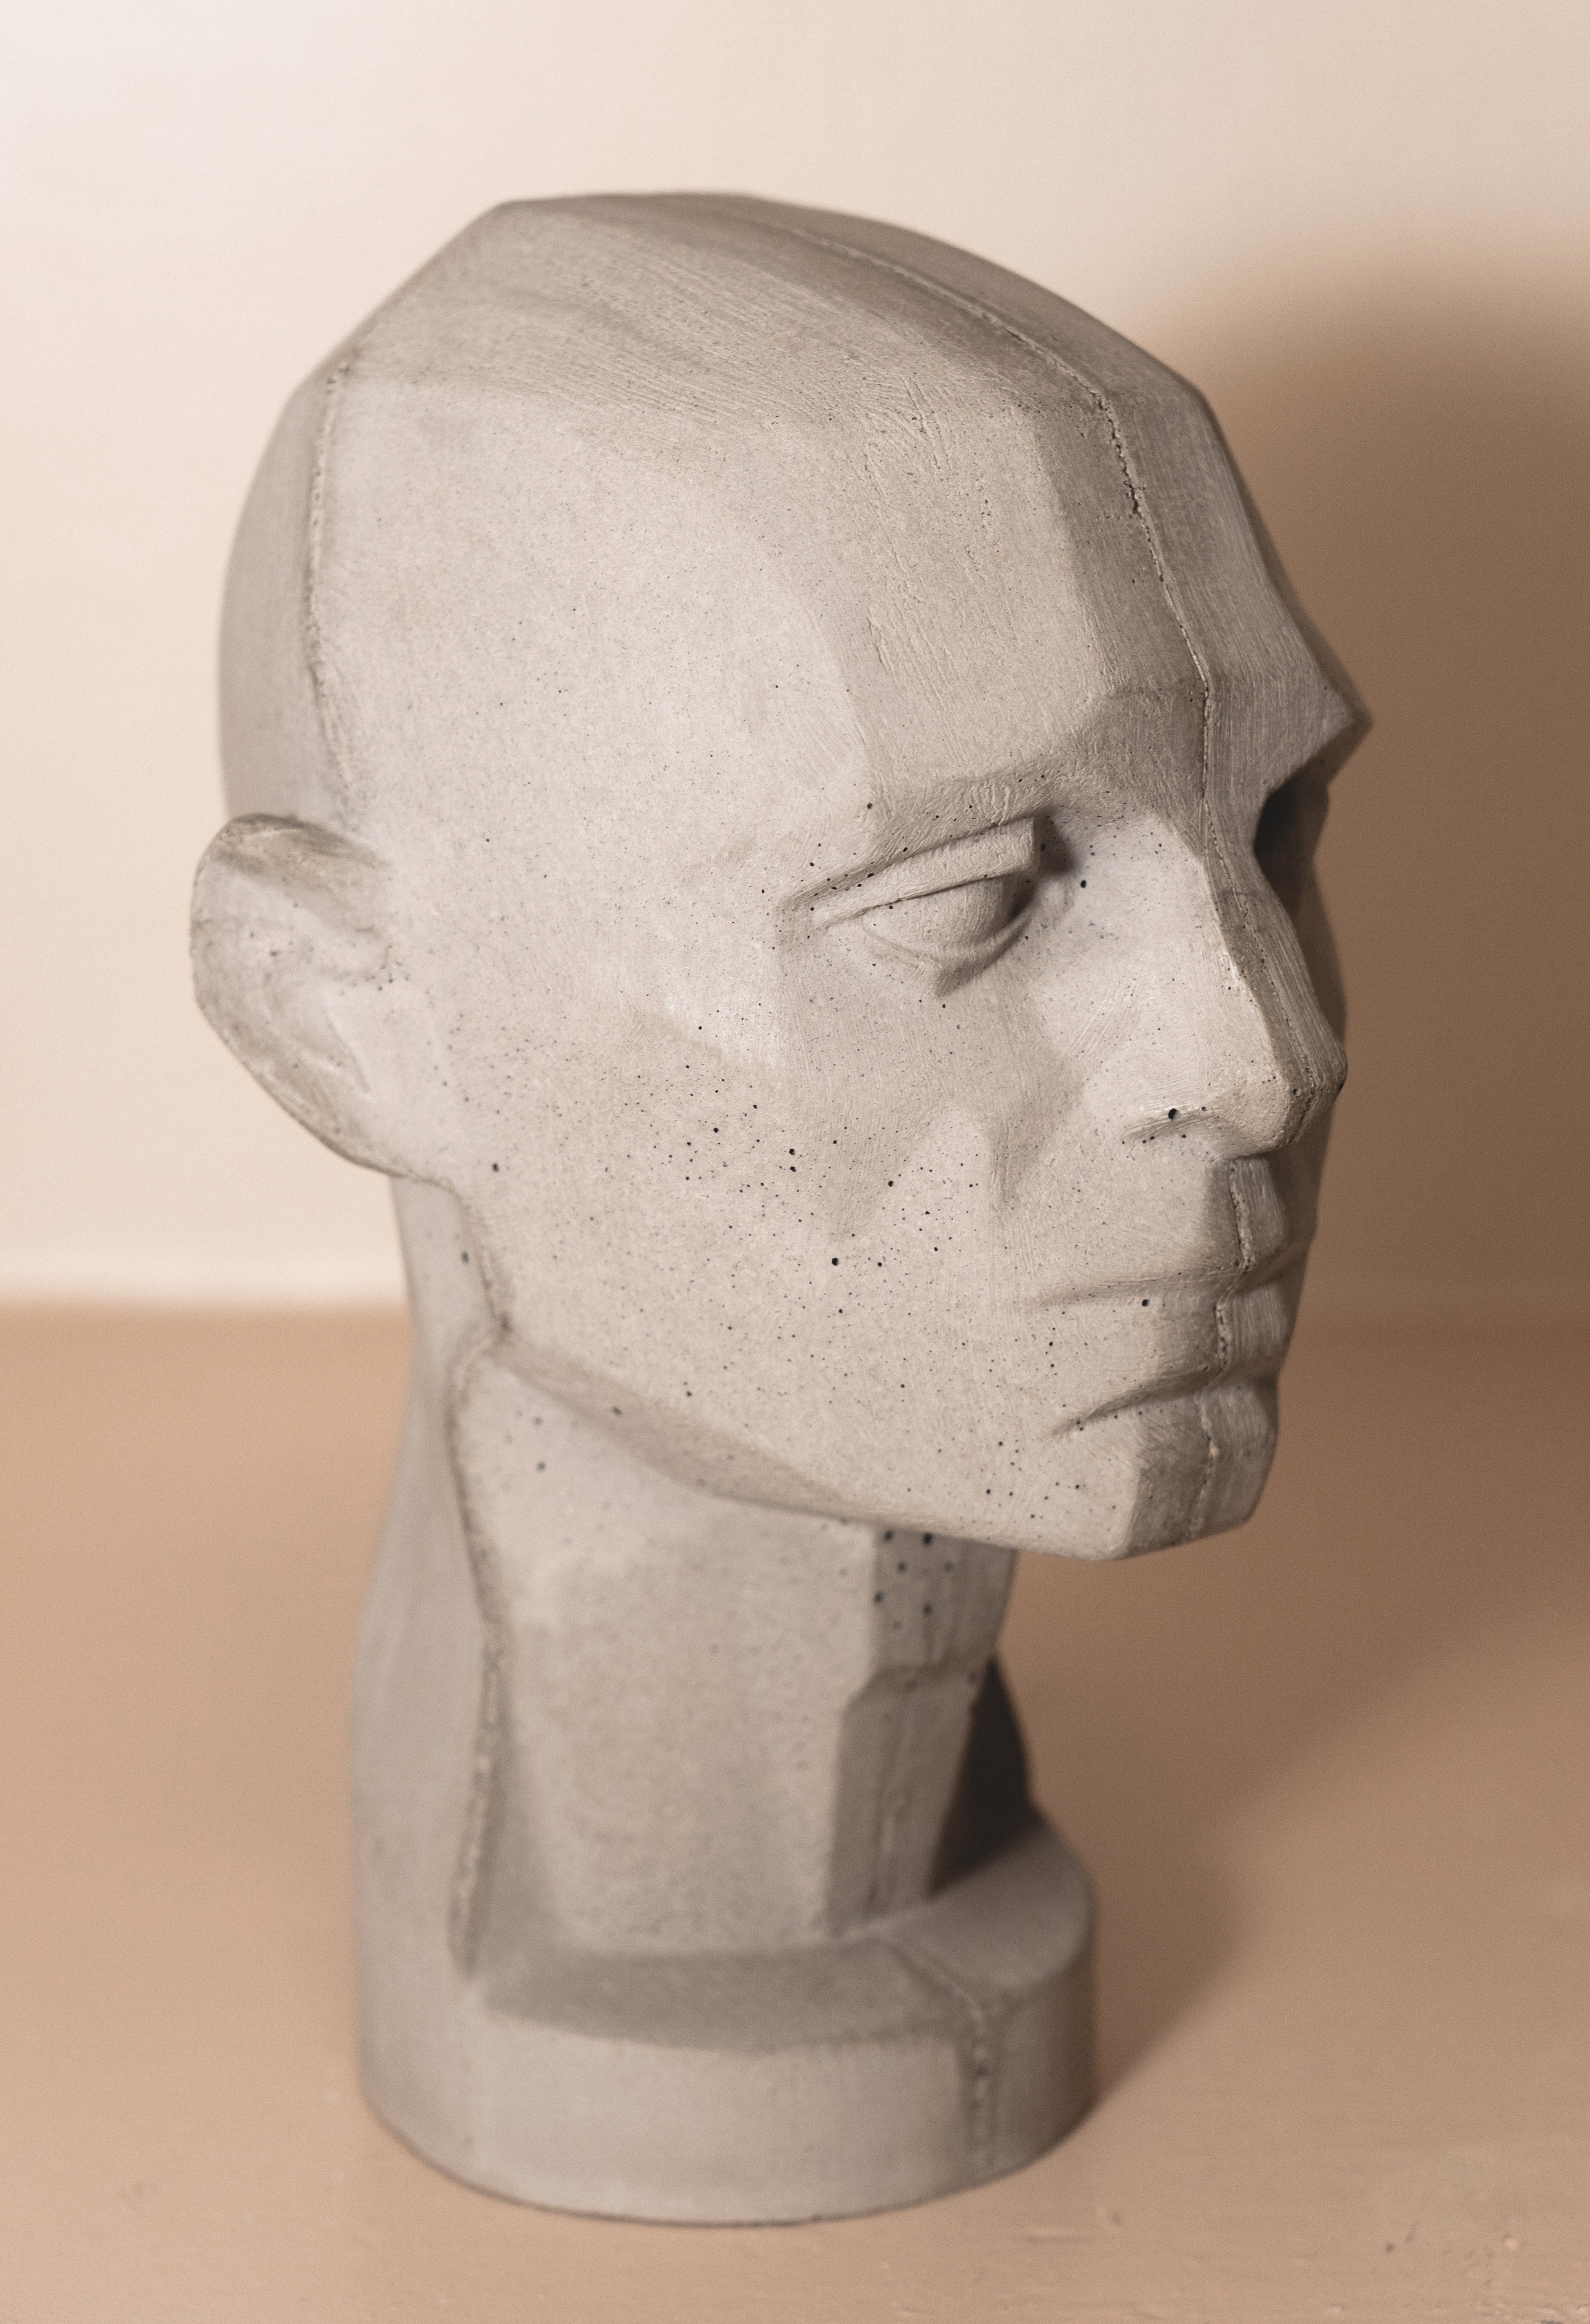
The finished product.
Approaching the problem
I began in early October by assessing the feasibility of creating a head. After preliminary research, I came up with the following questions:
- Can I acquire/create a model of the original head?
- Can the head be successfully cast using a mold?
- What materials would I need to accomplish this task?
Design decisions
Given the precise geometries of the head, I decided against a time-consuming approach that would require me to model the Asaro head from scratch and based solely off visual estimates. Instead, I began from a 3D scan of an Asaro head by online creator David JAv. This scan had some prominent artifacts that I did not want in my own cast, including an embossed logo from the original Asaro head, so this model would have to be processed further before it could be utilized in the mold design.
I looked online further to see whether others had worked in detail with concrete before, and what kinds of molds were possible. Various sources described the process of casting and curing concrete in molds for sculptural uses (candle holders, planters, etc.), which proved the viability of my project. Some had created silicone negatives out of 3d-printed positives to pour concrete into; others had directly 3d-printed the mold itself.
At this time, I took the model into Fusion and conducted a draft analysis along the sagittal plane (front-back direction) of the head. Draft angles were within acceptable tolerances, which assured me that I could develop a successful mold for my specific model. Further, I was persuaded to adopt the 3d-printed mold approach; while silicone's elasticity could improve release of the concrete sculpture, printing the negative directly would simplify the fabrication process, and (I hoped) make it more repeatable.
Last, I came up with a list of materials that would fulfill my needs:
- RapidSet Cement All, an ultra-fine concrete mix with light-colored aggregate
- A 3D-printed mold (PLA)
- Petroleum jelly, as a mold release agent
- Rubber bands, to keep the mold parts tightly joined
- Assorted PPE
Designing the mold
To proceed with the mold, I took the 3D scan model of the Asaro head and brought it into Blender. I removed the embossed text, used smooth and crease modifiers to smooth the faces and pinch the edges of the scan, and decimated the number of polygons by 60%.
In Fusion, I imported this mesh and converted it to a solid body. I cut this body out of a set of chamfered boxes to make the initial negative. Given the previous draft analysis, I decided to make a three-part mold out of this negative, with essentially two cuts: one roughly coronal (ear-to-ear) cut to split the front and back of the head, and another split down the middle of the front part. I hoped these cuts would enable the preservation of fine details like the ears and eyes and an easy release from the mold.
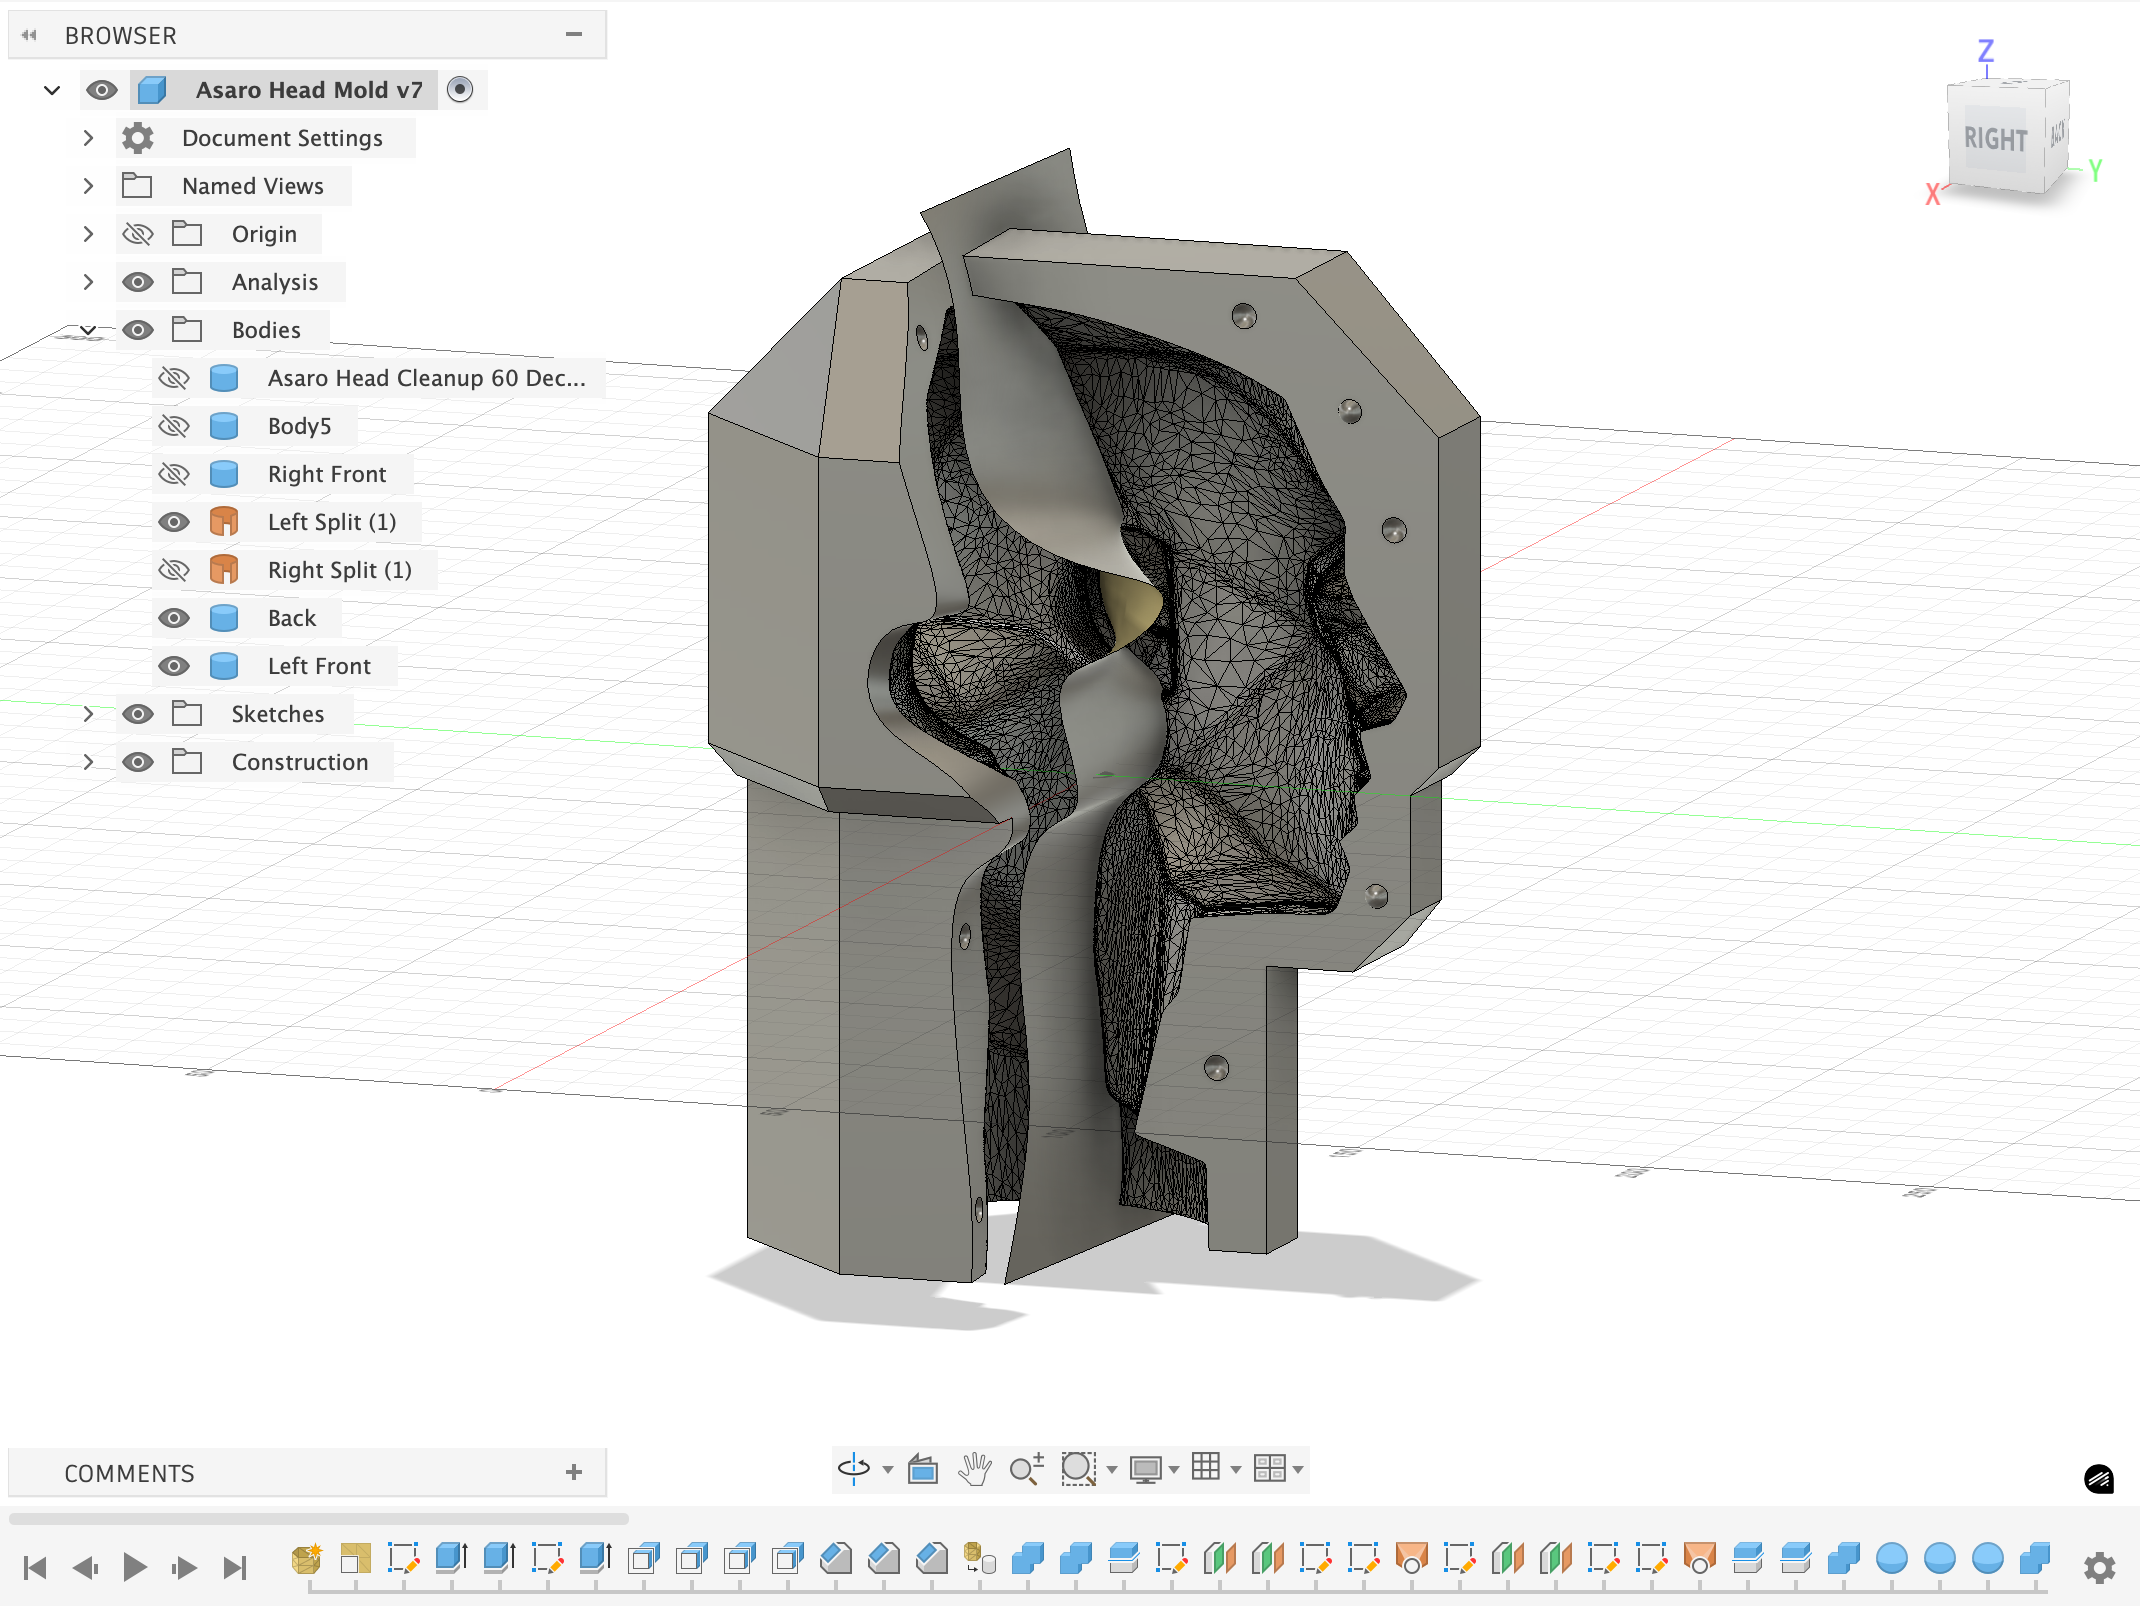
While the front split was quite easy, the ear-to-ear cut was difficult because to produce acceptable draft angles, the separation of the front and back of the head could not be linear. I used surfaces lofted between custom splines to create the tools to make these irregular cuts.
Finally, I added registration keys for alignment of the mold parts while casting. I also chose to pour concrete into the mold upside-down, to achieve a flat surface on the bottom of the head.
Lessons from Prototypes
Before pursuing the full cast, I 3D-printed a simplified mold for an object with similar triangular faces to test my procedure. (These molds closely followed this video guide on YouTube.) From this test, I calibrated layer height and other parameters for the 3D printer I was using at Stanford's Product Realization Lab. I also got a general sense of what casting with concrete is like—the preliminary step of coating the mold with a release agent, mixing the concrete mix with water, pouring and leveling the concrete, and removing and finishing the product after it cures.
I learned that petroleum jelly was a very effective mold release agent, and that I could accomplish a smooth and professional finish with the right recipe and mixing procedure. Re-tempering the concrete mix, that is, mixing it and then mixing it again after some delay, led to a very dark and rough product. Additionally, using enough rubber bands was necessary to increase tension on the interlocking mold parts and prevent leakage of the concrete.
Roadblocks
At this point, I felt ready to begin pouring concrete into the Asaro head molds. However, it took me several tries to get a satisfactory product; I ran into a couple issues along the way.
For one, I had difficulty getting an ideal finish. Applying too much mold release agent on my first pour led to visible irregularities on the surface of the Asaro head, so I learned to continue applying enough petroleum jelly to form a barrier between the PLA mold and the concrete but no more than necessary. Additionally, bubbles on the surface of the Asaro head kept appearing. This issue was not apparent in the preliminary test because there were no significant overhangs with that object; however, with a head oriented upside-down, air bubbles trapped themselves in the chin and neck area where they could not travel through the mold. I acquired a friend's massage gun (!) to help vibrate out these trapped air bubbles in future iterations.
I also ran into unexpected registration issues on reuse of the mold. Mold parts did not align nearly as well after one pour and cure as directly after print. Based on research, I determined that the exothermic curing of the concrete may have reached temperatures that could deform the PLA. Obviously, this is an undesirable effect, and with additional time I would look for solutions which resist this deflection and enable reuse. (Printing in ABS or adopting the silicone approach may help?) However, given that I only needed to fabricate a limited number of heads, I decided to print only one additional PLA mold to finish the casts.

A poured Asaro head mold in the process of curing
Final Cast
Overall, iterating on the fabrication process took far longer than expected due to the unforeseen issues. However, it was my first time working with concrete, and I learned many lessons that led to a product that mostly eliminated bubbling and registration issues. I stand by the selection of concrete as a material—the final Asaro head has a great heft to it, and its low reflectivity plainly shows the play of light and shadow in strong lighting environments. This is an ideal result, and has already gotten me attempting to sketch again!
Some important takeaways:
- This was a great project to practice CAD & 3D-printing skills, in the name of creating a useful tool for artistic sketching!
- Design iteration stalled during fabrication, and I would like to spend more time in future projects adapting my approach when encountering issues with my prototypes.
- Concrete takes experience to work with. I thought I had accounted for safety in my casting procedure, however, the deformation of the PLA indicated that I hadn't factored in all safety considerations at the onset.
- I enjoyed working with new materials and processes, and can see myself working on manufacturing projects in the future.